Mimicry
Playing by ear is essentially mimicry. To effectively mimic someone you need to recall what you heard, and be able execute the same idea. This is simple when it comes to speech because you are familiar enough with the language that it easy to remember what another person says, and to speak it back to them. There are no technical barriers for you to parrot back to me, what I just said, if you are a fluent English speaker.
When it comes to music it gets more challenging. Firstly you probably don’t know the language as well as your mother tongue. Secondly you might lack the physical skills necessary to play an idea that you hear. Music is a foreign language that presents barriers in the form of being highly unique, and the fact you are trying to speak through an instrument, which in my case is a some wood and metal that has been knocked together. Therefore it is clear that playing by ear is more complex than just a physical skill, but is a combination of familiarity with the language of music, your instrument of choice, and the physical skill of playing .
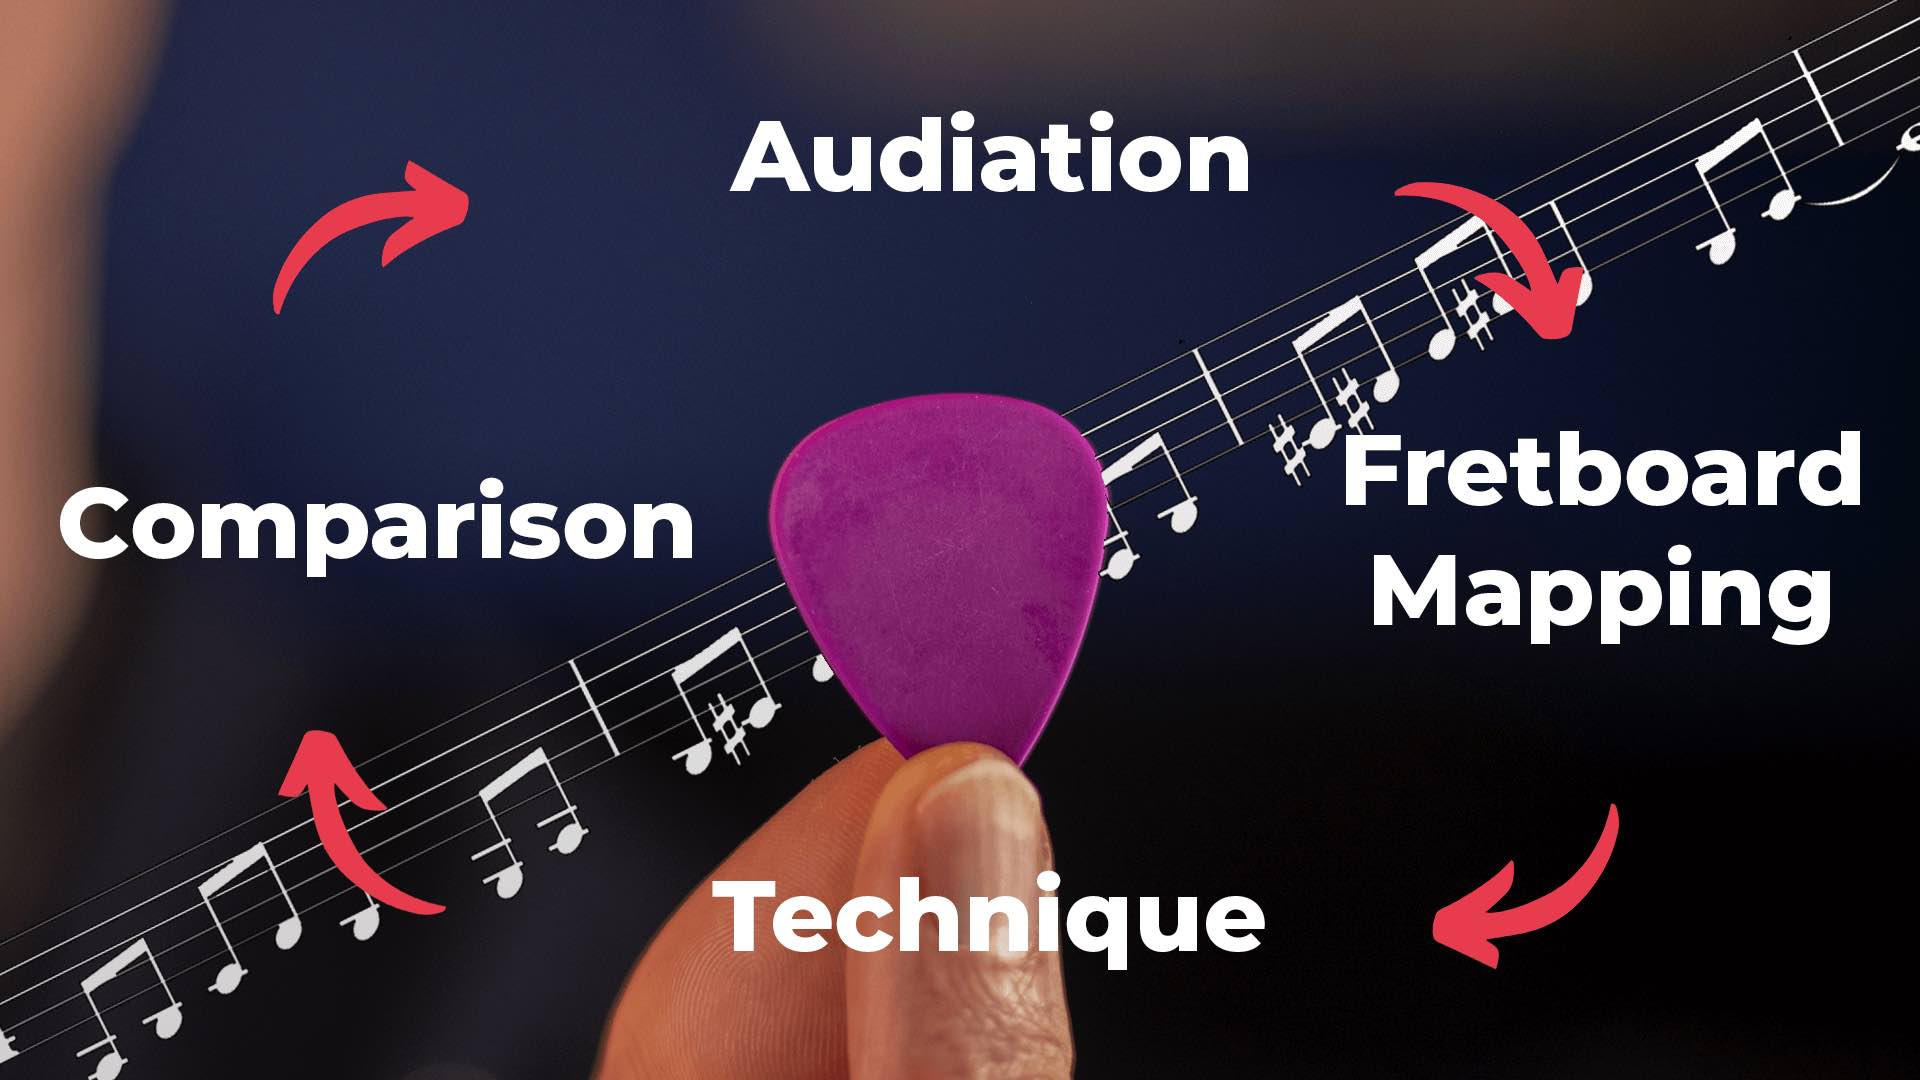
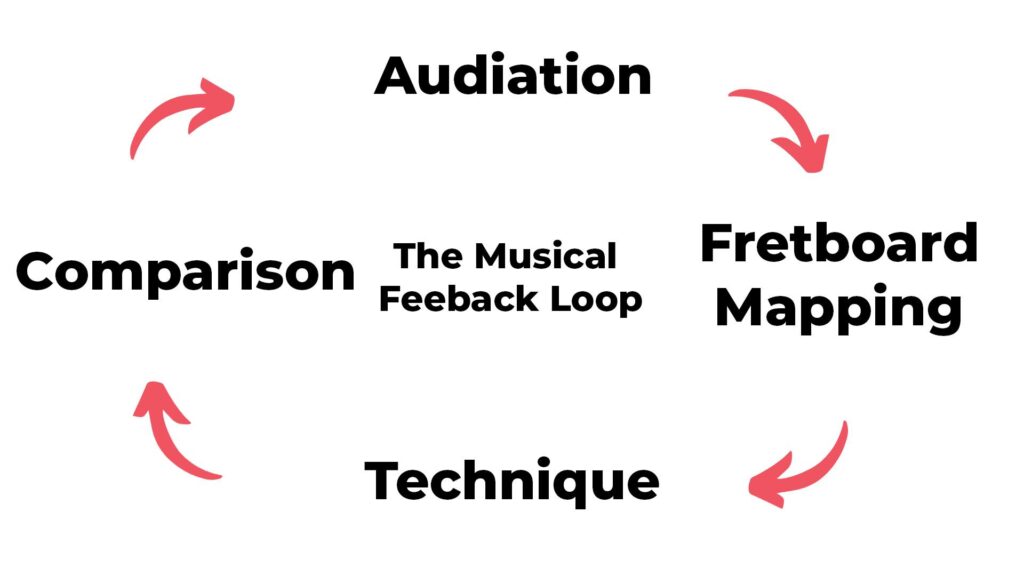
The Musical Feedback Loop
In my mind there are four steps to effectively playing by ear
- Recall – done through audiation, we’ll cover what audiation is in a minute
- Knowing where those sounds live on the fretboard – this is a concept I call fretboard mapping
- Mechanically executing the idea – This is what we think of as technique
- Listening to what you played and comparing it to what you audiated to ensure that you copied accurately – simply dubbed comparison.
In my experience technique is what most people think of when it comes to learning a musical instrument. This is the physical skill of playing. But it ignores the language aspect of music which is hugely important when it comes to being a competent musician. If you want to be able to play by ear you need to not only have the technical skills, but pair it with an understanding of what you are trying to play and how it appears on the instrument.
Lets dive into the four steps of the musical feedback loop so you can understand what each one is, how it works, and how it interacts with the loop to facilitate playing by ear.
Audiation
In order to be able to play by ear you must start with something called audiation. Audiation is your ability to imagine music. What you should try doing is thinking of the song happy birthday, don’t sing it aloud, but sing it in your head.
What you’re doing right now is audiating. It’s not a hereditary skill like perfect pitch that only some lucky individuals develop. It’s a learned skill that I think anyone can acquire.
Audiation is a term coined by the musicologist and educator Dr Edwin Gordon, in his words
“Audiation is to music, what thought is to language”
Dr Edwin Gordon
In everyday life you probably already read books in your head, and if you’re speaking to someone you might pause to construct a sentence in your mind before you say it aloud. Your ability to think using language is a skill you utilise everyday without even realising it.
It’s this same skill when translated to music that in Gordon’s opinion, and in my experience teaching these ideas, appears to be the key to excelling as a musician. In my opinion audiation is important because it links you to your instrument. By audiating what you want to play you dictate to the instrument what sounds it should produce. This ensures that you are telling the instrument what to do. Not the other way around.
So this is the first step, you need to be able to audiate in your mind the idea that has been played to you. That audiation needs to be strong enough that you can do it off by heart without any prompting. Later you’re are going to compare what you play to what you audiate to ensure that what you played was correct.
Fretboard Mapping
Step two is fretboard mapping. Fretboard mapping is your understanding of how the sounds you hear and audiate lay themselves out on the guitar. You probably have some degree of fretboard map established already. For example you should know some open chord shapes, and you might know a way of playing the minor pentatonic scale.
The point of the fretboard map though is not just to be able to play these things from memory but to understand the link between the sound you hear/audiate and where it sits on the fretboard. For example the minor pentatonic scale has a melody contained within it. That melody maps to the fretboard in the following manner
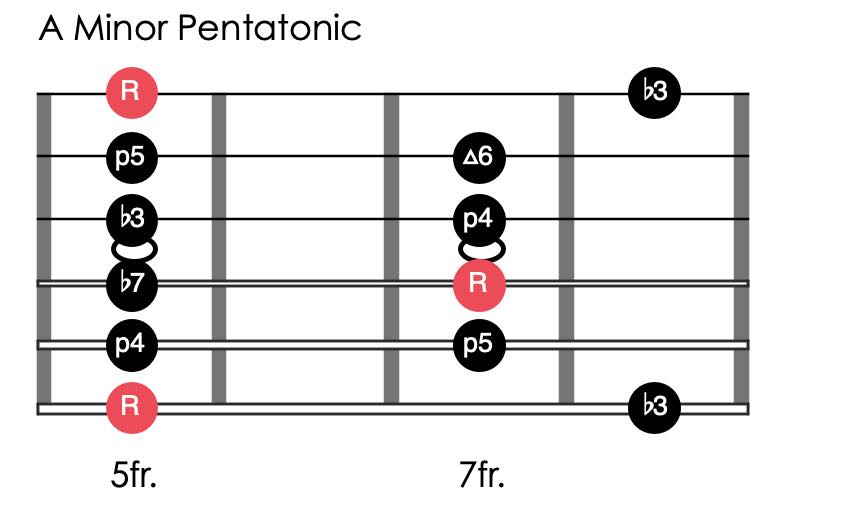
For your fretboard map to be effective you need to understand that when you hear or sing the melody of the minor pentatonic scale it looks like this on the guitar. At a more advanced level hopefully you’ll know all five ways of mapping the minor pentatonic on the guitar, using the CAGED system.
Every melody has a pattern that maps to the fretboard, it could be as simple as two notes, or a long complex passage. But every melody is comprised of the same 12 intervals in some combination, so thats the resolution you need construct your fretboard map at. In other words from any starting note you need to be able to find any of the 12 possible intervals that could follow it.
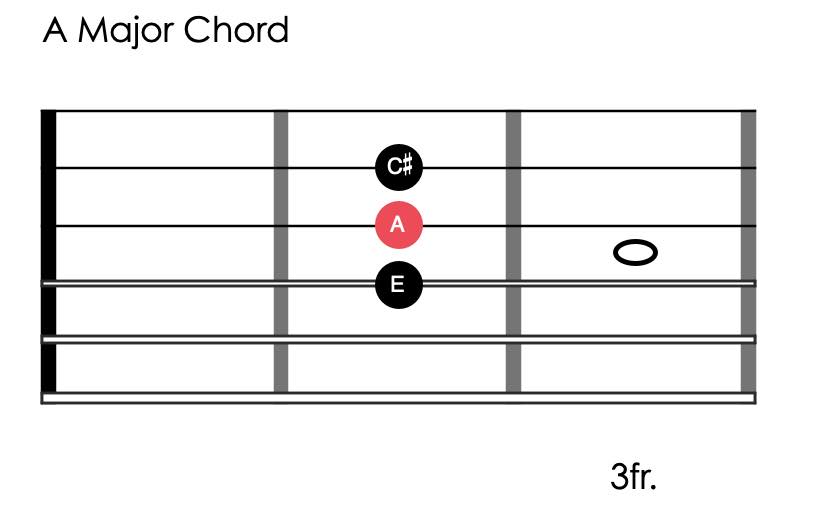
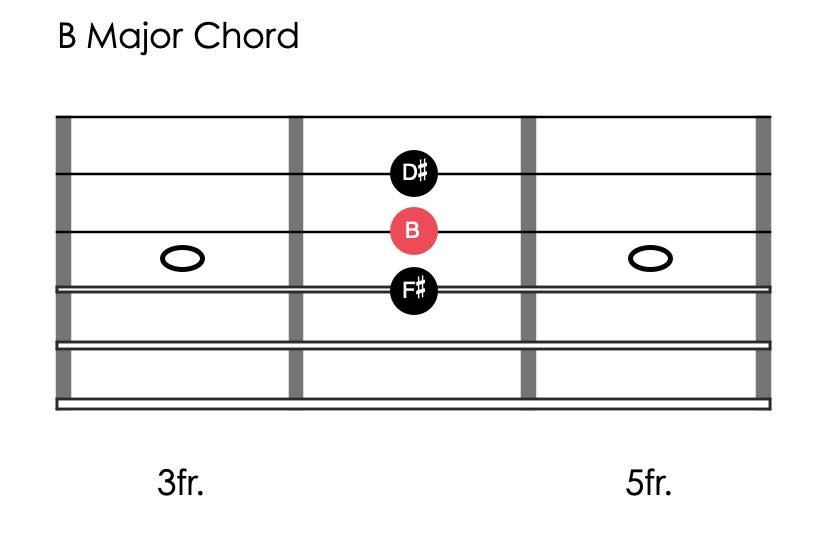
This might seem like a daunting task (a 24 fret guitar has 144 individual notes!), but it becomes significantly easier when you recognise that the fretboard map is key agnostic. All 12 keys use the same shapes. Take an A chord shape for example. In the open position it is a A chord. Move that shape up two frets and it becomes a B chord. The shape (aka map) remains the same, all that changes is where you play it.
There are five shapes that map themselves across the fretboard. This is the CAGED system. Each shape contains all 12 intervals. Therefore if you learn the interval map contained within each CAGED shape you will know the interval map for the whole fretboard and all 12 keys. In my mind each CAGED shape is it’s own neighbourhood, master one neighbourhood at a time and before long you will have a fretboard map that covers the whole fretboard.
Fretboard mapping is a topic that is too vast for a single post/video. If you would like to learn more about it let me know in the comments and I’ll make a lesson covering it in more detail.
Technique
The fretboard map is important because it represents the relationships between the sounds you hear, and where they are on the instrument. Now you have mapped out your phrase it’s time to learn how to play it. This is step 3, technique.
For less technical phrases you might be able to play it immediately, or after a couple of attempts. This is because you already posses the technique to play it. If the mistakes you are making are easy to fix it is more likely that you are refining your fretboard map in the process of trying to play the phrase.
For something you can’t play you need to go through the phrase and problem solve all the things you find difficult until you can play the full idea – this is what you probably think of as practice. You need to master the technique required to play the phrase. You know what the phrase sounds like, which means you can audiate it. You know where those sounds are on the fretboard map. You now need to learn the physical skill of playing the phrase.
The more advanced your technique becomes the faster this step will be. When the technique is no longer a barrier you will be able to play ideas as soon as you hear them, so long as your audiation is accurate and the sounds already been incorporated into your fretboard map.
For more tips on how to practice effectively check out Perfect practice – This is my free practice guide, that will show you how to practice like a pro.

Comparison
So at this stage it might appear that you are done, you have figured out how to play the phrase you heard, both in terms of how the sounds map to the fretboard and the physical skill of executing the idea. But throughout this whole process how have you been able to tell whether what you played was right or wrong?
You need compare the sounds that your guitar makes to what you are audiating. Does what you just played sound like the idea you are trying to copy? If it does, great your done. If it doesn’t, why not? You need to go back and figure out where in the feedback loop you have made a mistake.
Is you technique insufficient and preventing you from executing the idea properly? Are you playing a wrong pitch somewhere and have therefore incorrectly mapped the sounds in your head to the fretboard?
Or have you not audiated the idea correctly? If this is the case then you might have mapped your incorrect audiation right, and learned to play it accurately. But you have played the wrong thing because your audiation was not correct to begin with.
This is why audiation is so important. If what you audiate is wrong you will not be able to play what you hear. You will play something, but it is unlikely to match the thing that you heard in the first place. This goes for anything you are trying to learn on the instrument, if you are not audiating something correctly it is extremely unlikely that it will come out of the guitar correctly.
Final Thoughts
This is how I conceptualise playing by ear. First audiate it, second figure out how those sounds appear on the fretboard, third try to physically play the idea, finally compare what you played to what you audiated. If they match you know you have done it right. If they don’t match you need to work backwards through the loop and figure out which step is tripping you up
My favourite question to ask musicians is “Do you hear what you play in your head”. I’ve yet to find one who says “No”. It appears to me that for advanced musicians the musical feedback loop is a constantly cycling as they play. They are continually comparing what they play to what they audiate to ensure that the idea is coming out correctly.
If you aren’t doing this already you can make yourself more aware of it by breaking the feedback loop into steps like we did in this post. Then focus on each step individually before trying to incorporate them all together.
If you would like further examples of how to practice the ideas from this post, suggestions of songs to try and learn by ear, and the backing track from the video intro jam, check out the lesson pack below.
Lesson Pack
Want to get the most out of this lesson?
The lesson packs contains detailed notes on what to practice and how, a backing track, tab, and other useful learning aids.
Lesson Packs Coming Soon!